Aftermarket activity

Industrialization of innovative projects

Back to the list

Temperature sensors

The advent of the autonomous car has highlighted the fundamental importance of having good sensors. That being said, we have long been committed to providing effective – and reliable – sensors to our customers. So whether you are looking for engine and transmission sensors, or for comfort and safety – not to mention emissions and e-mobility – you should definitely take a look at our range.

Back to the list
Temperature
sensors

Temperature sensors play a crucial role in controlling vehicle pollution and fuel consumption. This information needs to be transmitted to the ECU so it can regulate the injection system parameters.

There are several types of temperature sensors:

  1. The coolant temperature sensor: located in the refrigeration circuit pipe, it measures the engine coolant temperature. The measured data is sent directly to the ECU.
  2. Intake air temperature sensor: located in the intake manifold, it records the air temperature and is capable of estimating the density of the air drawn in, in combination with the Manifold Absolute Pressure (MAP) sensor.
  3. The outdoor temperature sensor: as the name suggests, it will give the outdoor temperature. As with the above temperature sensors, the information measured is transmitted directly to the ECU, which will regulate injection management by cross-checking with data from other sensors.

These sensors are equipped with a thermistor at one end, which allows them to be in direct contact with the coolant, the air, or the outside temperature to send the information directly to the ECU.

Technologies
Technical information
Frequently asked questions
Resources
Technologies

NTC TYPE THERMISTOR

NTC (Negative Temperature Coefficient) thermistors work as follows: as the exhaust gas temperature increases, the resistance value will gradually decrease.

PTC TYPE THERMISTOR

PTC (Positive Temperature Coefficient) thermistors work in the opposite way; thus when the exhaust gas temperature increases, the resistance value will increase in the same way.

Note: this thermistor is the most common on the market, but in both cases a temperature is assigned to the ECU resistor.

Technical information

SYMPTOMS

The following symptoms are frequently associated with a temperature sensor failure:

  • Fault signal on the dashboard;
  • Increased fuel consumption;
  • Increased pollutant emissions (HC, CO and Nox);
  • Loss of engine power;
  • Vehicle overheat;
  • Difficult vehicle start up.

DIAGNOSIS PROCEDURE

First and foremost, you need to visually inspect the temperature sensor to determine the presence of a fault. It is therefore strongly recommended to check that the following items are in working order:

  • The metal body/thermistor (visible dents, cracks or any kind of blow that may have damaged it);
  • The connector (loose connections, melted or cracked wires);
  • The wiring.

You can also use a multimeter to check the correct operation of the sensor.

If the previous tests are not conclusive, you will probably need to replace your temperature sensor.

CAUSES OF FAILURE

It is possible that a temperature sensor is no longer working due to:

  • A crack or break due to mechanical or thermal stress;
  • Deformation or denting due to overheating of the sensor;
  • Leakage due to poorly fitted or worn sealing parts;
  • Excessive vibration or short circuits;
  • Contamination of the sensor by a coolant;
  • Clogging of the duct windows by airborne impurities, preventing measurements from being taken.

INSTALLATION INSTRUCTIONS

To ensure a quick and efficient installation, you must refer to the following instructions:

  1. Disconnect the negative terminal of the battery.
  2. Locate the sensor in question (its location may vary, but will always be on the exhaust line).
  3. Disconnect the connector.
  4. Next, unscrew the sensor with a socket spanner of the same diameter as the sensor screw.
  5. Install the new sensor (you can apply a degreasing agent to the thread to facilitate installation) and tighten it to the torque recommended by the manufacturer.
  6. Reposition the connector and the negative battery terminal.
  7. If necessary, connect the diagnostic tool to clear any fault codes.

INSTALLATION TIPS

As the temperature sensor is essential to the correct operation of the engine, it is important to follow a certain number of recommendations when replacing it:

  • You can apply a degreasing agent to the sensor thread to facilitate its replacement;
  • The torque applied should be observe the manufacturer’s recommendations (between 30 and 50 Nm);
  • Replace the gaskets when the sensor is replaced;
  • Clear the fault code using the diagnostic tool in order to inform the ECU of the sensor change.

PREVENTIVE INFORMATION

The above items are provided for information purposes only. They do not replace the advice of a qualified technician or mechanic. We strongly recommend that you consult a professional if you are unsure of what to do. Otherwise, we cannot accept responsibility for any damage to your vehicle.

Frequently asked questions
What symptoms should I look out for?

When a temperature sensor fails, the engine light (an amber light) comes on, or the glow plug light flashes. Your vehicle’s fuel consumption will increase, and so will its pollutant emissions. Your vehicle’s engine is likely to lose power and have difficulty starting up. The malfunctioning of the temperature sensor also causes the car to overheat.

How to identify the fault?

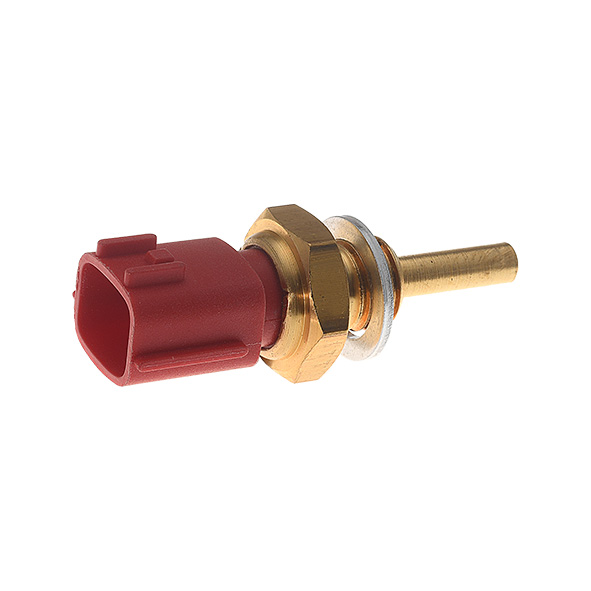
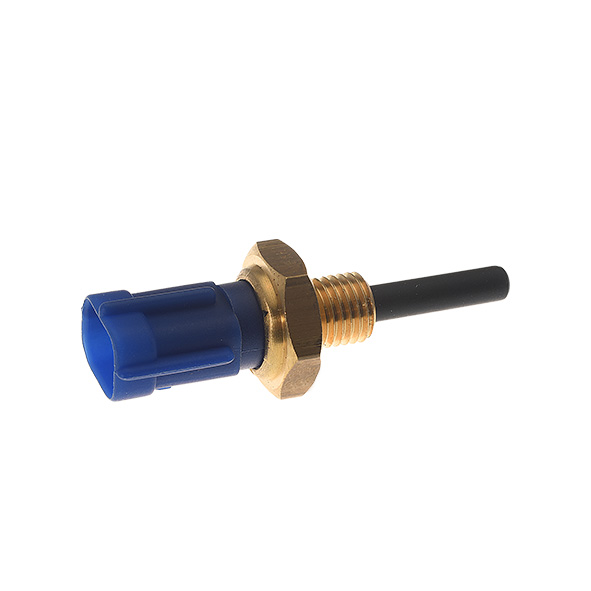
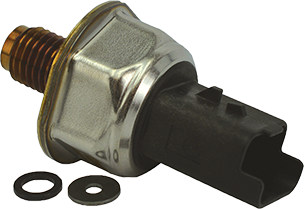
First of all, we strongly advise you to visually check the temperature sensor; i.e., the metal body of the sensor (visible dents, cracks or any kind of blow that could have damaged it), the connector (visible loose connections, melted or cracked wires) and its wiring (ensure it is not damaged or broken).

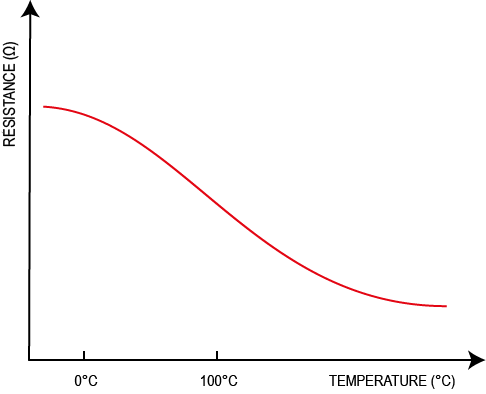
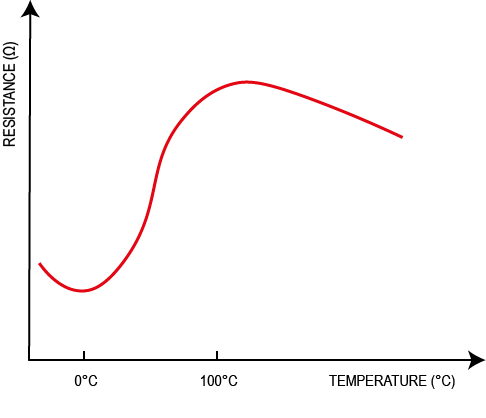
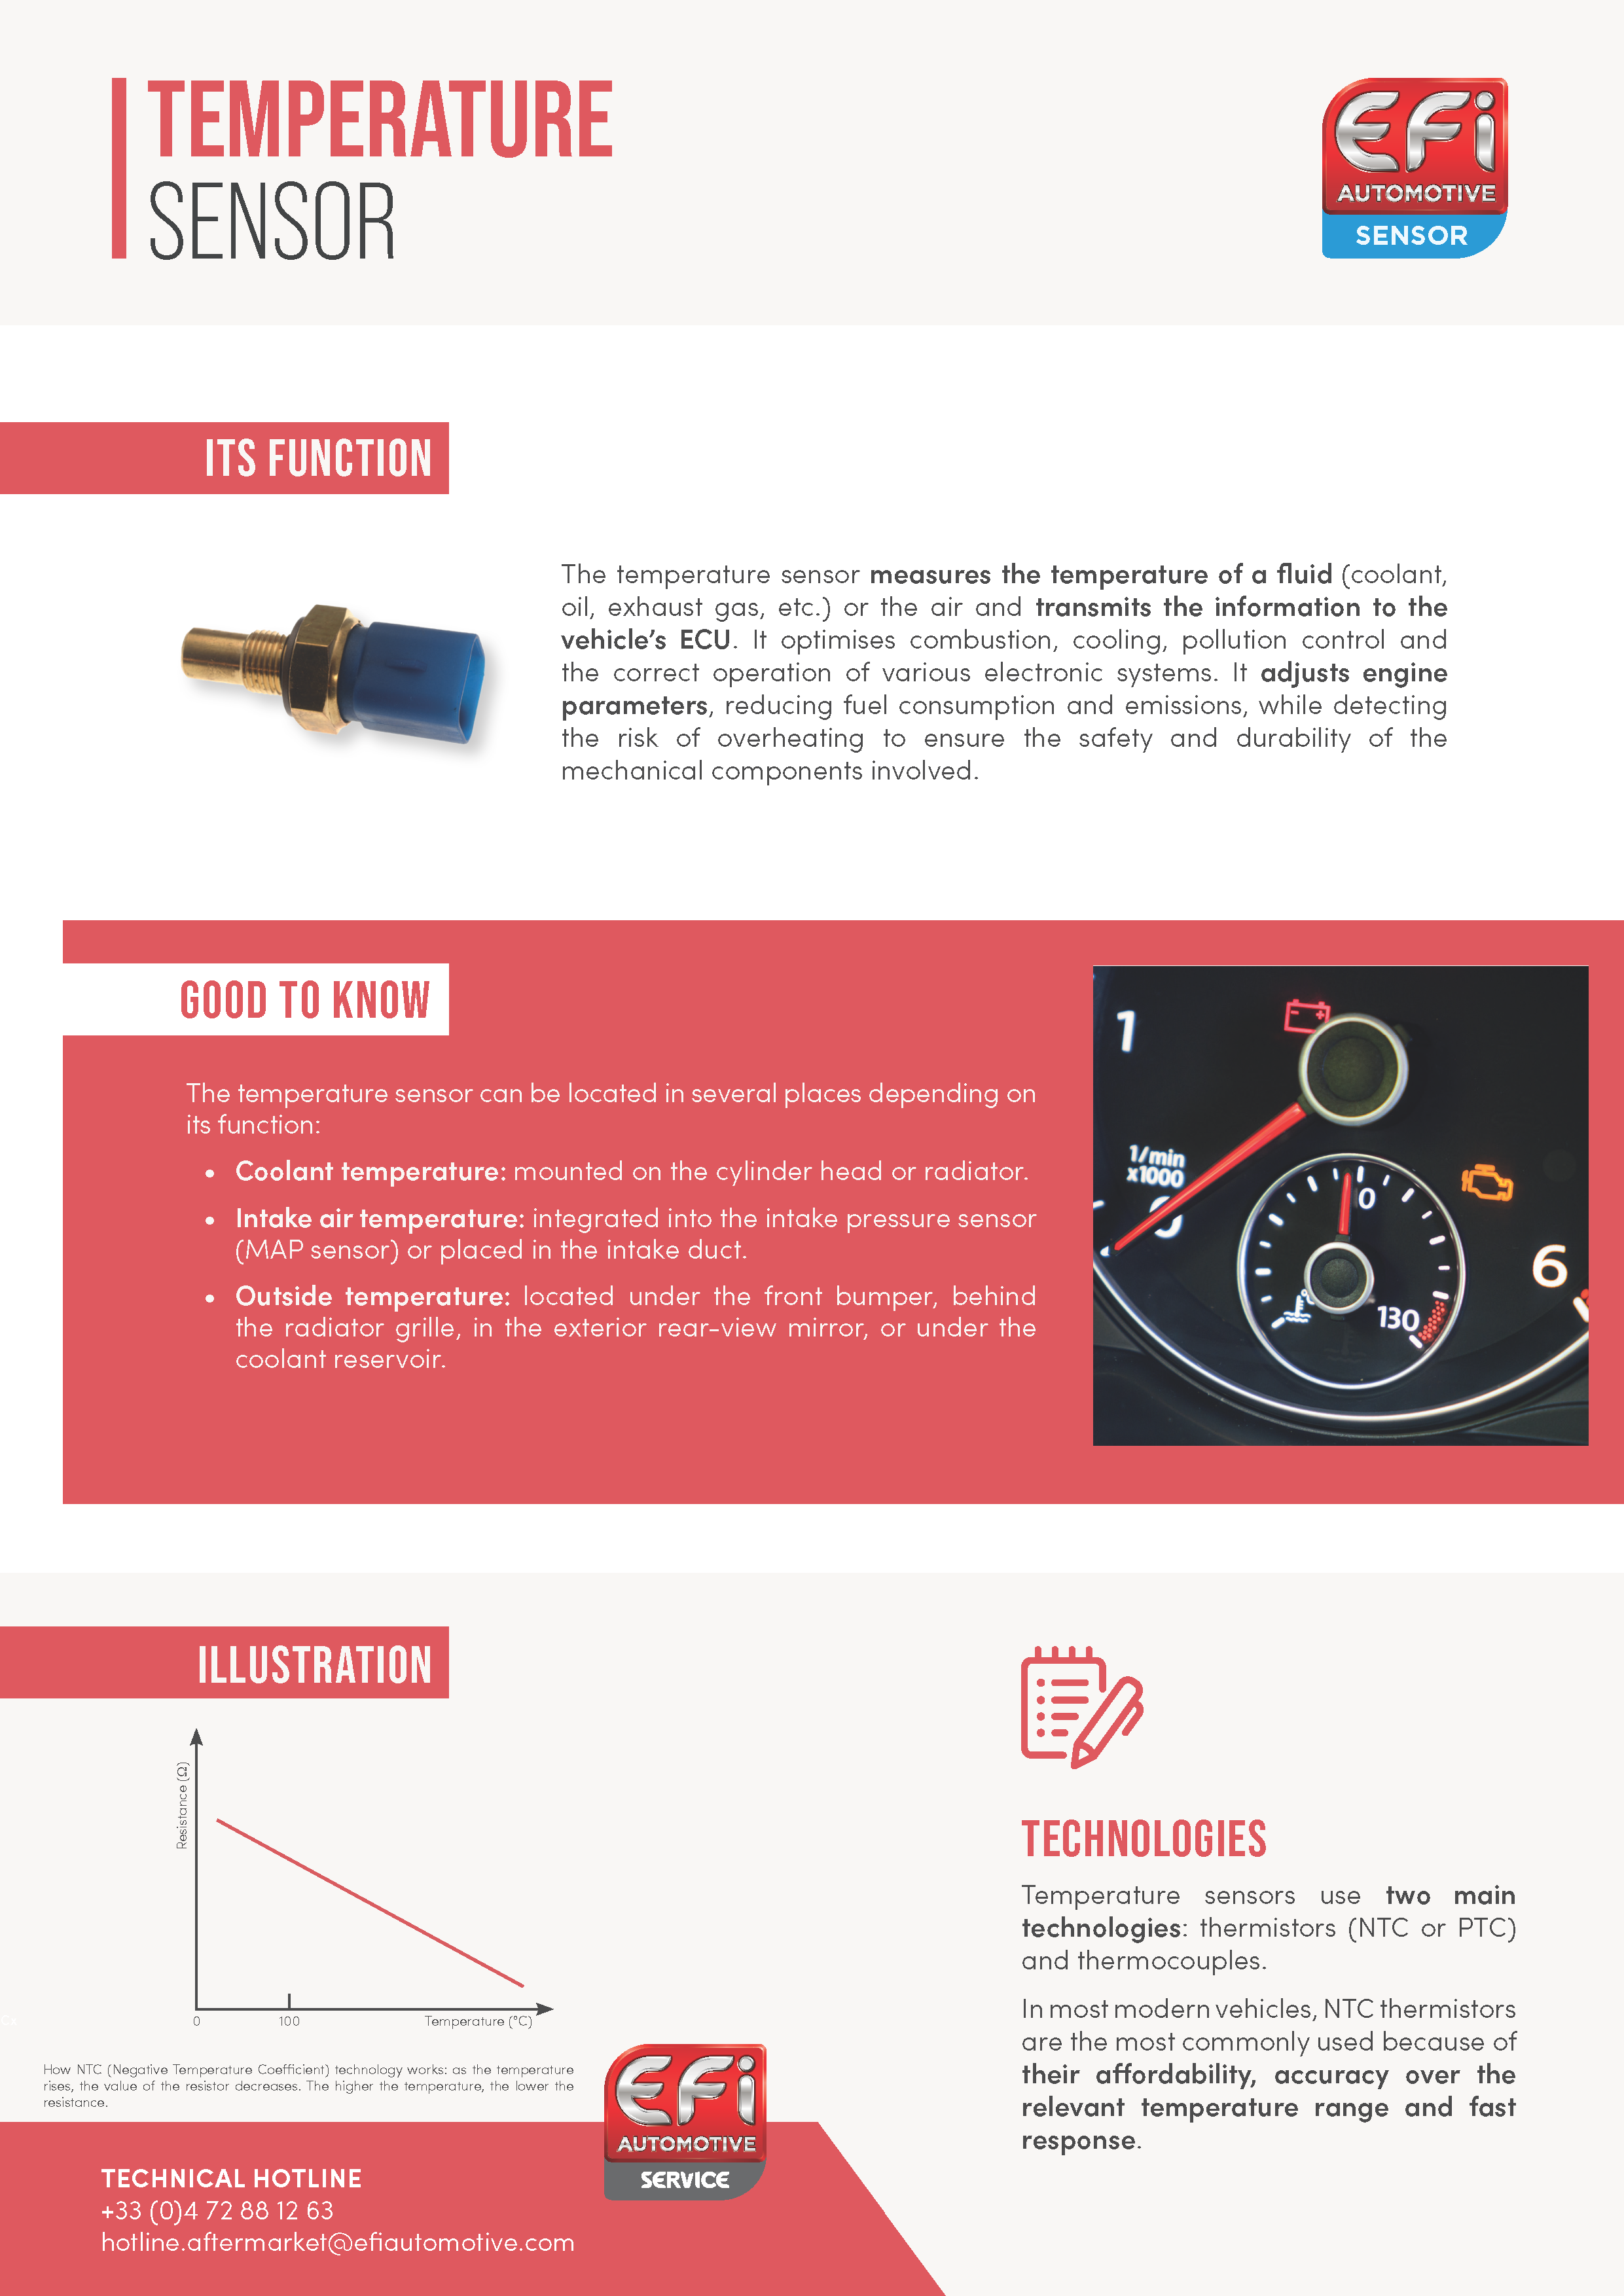
Secondly, you can test your sensor’s correct functioning by checking its resistance. By plugging the measuring tool into the sensor connector and heating the side where the probe is located, you can check whether the resistance fluctuates. However, you will need to make sure that you have set the multimeter to 20M Ω, and that you know which technology your sensor uses (NTC or PTC type – see “Technologies” section). Depending on the sensor type, either the resistance will increase when the temperature increases (PTC), or conversely it will decrease when the temperature increases (NTC).

If the above tests are not conclusive, then it would appear that you need to replace your vehicle’s temperature sensor.

Why does my temperature sensor need replacing?

Although automotive sensors meet very strict standards, they do not last forever. Several elements may also fail, thus requiring replacement; among which a broken sensor cable (which may be due to torsion and/or internal vibration), or a torn wire connecting the sensor to the ECU. The sensor may also have been damaged by a liquid, such as a coolant. Of course, time-related wear and tear is also a potential cause of failure, but that goes for any type of product. We recommend that you replace it every 25,000 kilometers.

What are the installation instructions?

We recommend the following steps to replace your exhaust temperature sensor as efficiently as possible and to limit possible mistakes:

  1. Disconnect the negative terminal of the battery.
  2. Locate the sensor in question (its location may vary, but will always be on the exhaust line).
  3. Disconnect the connector.
  4. Next, unscrew the sensor with a socket spanner of the same diameter as the sensor screw.
  5. Install the new sensor (you can apply a degreasing agent to the thread to facilitate installation) and tighten it to the torque recommended by the manufacturer.
  6. Reposition the connector and the negative battery terminal.
  7. If necessary, connect the diagnostic tool to clear any fault codes.
What tips should I use to extend the life of my temperature sensor?

As a sensor specialist, we recommend the following to extend your exhaust gas temperature sensor’s durability:

  • A degreasing agent can be applied to the sensor thread to facilitate its replacement;
  • The torque applied should be observe the manufacturer’s recommendations (between 40 and 45 Nm);
  • Clear the fault code using the diagnostic tool in order to inform the ECU of the sensor change.
Resources
You can download the best-sellers associated with this product family below.
Best-sellers
Find out more about our top 8 sellers for the European market.
Download